
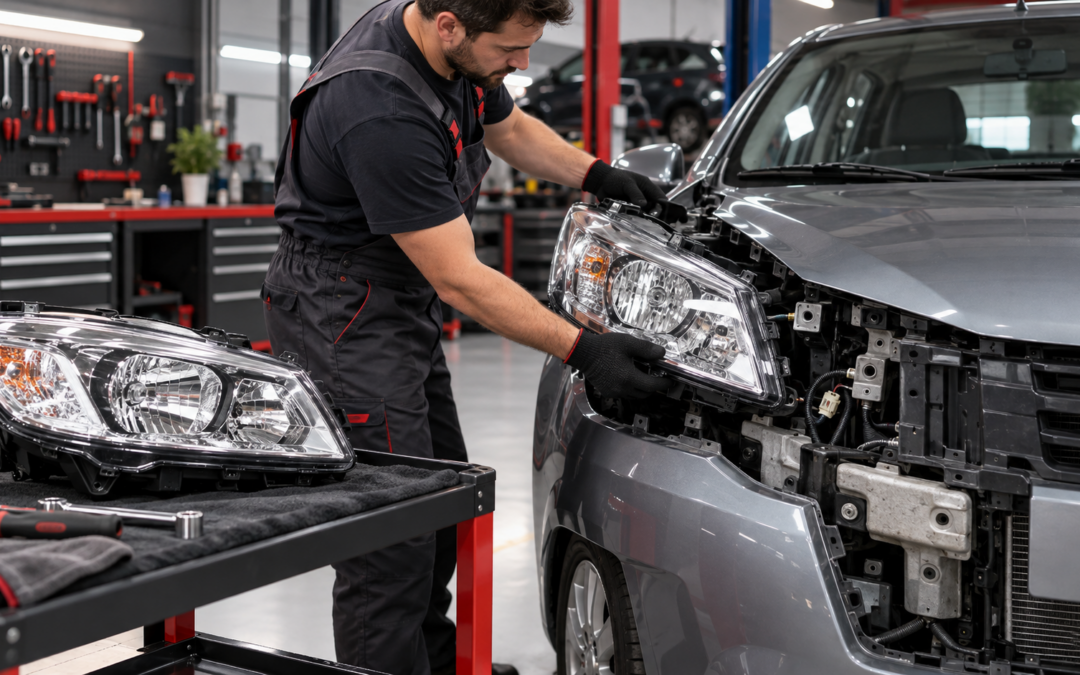
A cracked or misted Renault Sandero headlight affects more than the appearance of the car. Poor beam output reduces night visibility, broken mounting tabs allow the lamp to shake and water inside the housing can damage bulbs and connectors. Replacing the complete headlight assembly is often the cleanest solution after collision damage or a badly weathered lens. This guide covers safe identification, removal planning and fitment checks for a 2012 Sandero 1.6.
When does the complete headlight need replacement?
A bulb is replaceable on its own, so first determine whether the fault is limited to the bulb or wiring. Replace the full assembly when the lens or housing is cracked, mounting tabs are broken, the reflector is burnt, the adjuster is damaged or water repeatedly enters through the casing. Light surface haze may sometimes be restored, but deep crazing and damaged reflectors require more than polishing.
Identify the correct side
Vehicle parts are normally described from the driver’s seating position. In South Africa, the driver sits on the right, so a “right front headlamp” is the driver’s-side unit. Do not order from a photograph alone, because a mirrored image or supplier terminology can cause confusion. State both “right/driver side” or “left/passenger side” and provide a photo of the damaged lamp on the vehicle.
Check more than the lens shape
Two Sandero lamps can look similar but differ at the back. Compare the housing part number, model year, plug arrangement, bulb technology, adjuster type and every mounting tab. Confirm whether bulbs, dust caps, wiring sections or levelling motors are included. Used assemblies are often sold as the housing only unless accessories are specifically listed.
Inspect the panel gaps around the old lamp. If the bumper, fender, slam panel or headlight support has moved in a collision, the replacement may not align until the body structure and brackets are corrected.
Tools and safety preparation
Work on a cool vehicle parked on level ground. Switch off the lights, remove the key and disconnect the negative battery terminal if the electrical connector or surrounding wiring will be handled. Keep the new or used lamp on a padded surface so that the lens and tabs are not scratched.
The exact access procedure can vary with bumper and trim configuration. Basic tools may include trim-clip removers, screwdrivers and sockets. Avoid forcing plastic fasteners; aged clips and tabs become brittle. If bumper removal is needed, support it so that it does not hang by fog-light or sensor wiring.
General removal sequence
- Photograph the existing gaps, wiring and fastener positions before disassembly.
- Remove only the covers, grille sections or bumper fasteners required for clear access.
- Support the lamp while removing its mounting bolts so that the last tab is not loaded.
- Release the electrical plug by its locking tab rather than pulling on the wires.
- Compare the old and replacement assemblies side by side before transferring bulbs or caps.
- Inspect the connector for heat damage, corrosion and loose terminals.
Inspecting a used Sandero headlight
Look closely at all mounting points. A tab that has been glued can fail once the vehicle vibrates, and a missing tab makes beam alignment difficult. Check for cracks along the lens seam and signs of old water marks inside the housing. The reflector should be bright, not peeling or burnt. Confirm that adjusters move normally without excessive play.
The catalogue lists a right-front Renault Sandero headlamp assembly from an identified 2012 1.6-litre donor. Ask for current-condition photographs, because the catalogue illustration may represent the part type rather than the exact unit.
Fitting and aligning the lamp
Transfer only compatible bulbs, holders and covers. Do not touch the glass of a halogen bulb with bare fingers, because skin oil can create a hot spot. Connect the plug and test low beam, high beam, indicator and parking light before reinstalling all trim.
Seat the housing gently against its locating points and start every bolt by hand. Tightening one mount fully before the others are aligned can stress a plastic tab. Refit the bumper and trim clips, then check that the lamp sits evenly against the fender, bonnet and grille.
Finally, have the beam aim checked. A lamp can illuminate and still point too high, too low or into oncoming traffic. Proper alignment improves safety and helps the vehicle meet roadworthy requirements.
How to protect the replacement headlight
Make sure every rear dust cap and seal is installed correctly. Missing caps allow dust and moisture to reach the reflector. Route wiring so that it cannot rub on sharp brackets or touch hot components, and replace broken bumper or wheel-arch clips that could allow water and dirt to reach the lamp.
Use the correct bulb wattage. A higher-wattage bulb can overheat the reflector, connector and wiring without producing a properly controlled beam. When washing the engine bay, avoid directing high-pressure water at the back of the headlight. If light condensation appears after fitting, check covers, vents and the lens seam before it becomes standing water. These inexpensive checks help preserve a good used housing.
Clean the lens with products intended for automotive plastics, not harsh household solvents that can damage the protective coating.
What if the new lamp still does not work?
Check the bulb, fuse, earth, connector and supply voltage. Collision damage may pull on a wiring loom even when the plug looks intact. If only one function fails, trace that circuit rather than replacing the entire lamp again.
Frequently asked questions
Can moisture inside a headlight be repaired?
Light condensation can occur temporarily, but standing water or repeated misting suggests a failed seal, crack or missing rear cover.
Are left and right headlights interchangeable?
No. The housing shape, mounts and beam pattern are side-specific.
Can I use a different-year Sandero headlight?
Only if the part number, shape, mounting points and electrical specification match. Facelift changes can be significant.
Need a Renault Sandero headlight in Cape Town?
Send a photo of the vehicle front, the damaged lamp and its rear label. Cape Town Auto Spares can compare the donor part and arrange nationwide courier delivery.